I built a router table.
This is a long overdue (and tedious) write-up of my experience of custom-building a router table.
(Clarification: router as in r-OW-ter table as opposed to r-OO-ter (i.e. the box you get from your ISP for your home Wifi. The pronounciation is annoying, especially for someone who works in computers. Anyway.)
My closer associates know that I am a mostly clueless wannabe woodworker with more tools than knowledge. I have more saws than you could care to name, let alone actually find a constructive use for.
I post it here mostly, as ever, for posterity, and vaguely in the eventuality that someone else is considering the same. Building your own router table is absolutely not a new thing - the web and YouTube is awash with examples of how to do it (and how to do it far better than I did) but finding the balance between budget / value / input / reward seems to be a common theme. I mean, you can obviously just buy complete kits off the shelf.. but what kind of woodworker would you be if you couldn’t do… some of it?
Most of this came on the back of a decision a few years prior, where I had bought every imaginable tool with entirely no idea how to use them. I had the lot - planer / thicknesser, router table, worksite table saw. I had thought I needed a proper big cabinet saw, and all manner of other machinery.
Fortunately at some point I stopped and slapped myself. I was bogged down in the kit and the shopping list without actually investing any effort in to what it was I was trying to achieve. So I had been through a process of subsequently evicting all these tools I’d bought - on a promise that I would only bring them back in to my workshop (garage) when I was ready to spend the time to learn how to use them properly and so on.
(I have the usual busy life, mortgage, kids, dog scenario… so woodworking is very much a hobby / lifestyle thing for me.) So having built some things over lockdown and whatnot that I was actually pleased with, I felt comfortable to go tool shopping.
This was hardly a chore but I once again found myself in a predicament. Despite having a got rid of the table saw, and being told repeatedly by UK associates that a table saw wasn’t required, much of my ‘tuition’ comes from US-based woodworkers where the table saw features heavily. I weighed up many options, and when I finally decided on the Bosch GTS 10 XC - a sort of combi / worksite saw which suited my limited garage pretty well; I felt the money ‘saved’ in not buying a large cabinet saw meant I could consider again a router table.
This time however, I was determined to build my own. A router table consists mostly of four or five parts:
- Base/stand
- Worktop / surface + fence + optionally a mitre gauge
- Insert plate (holds the router motor)
- Router motor
- Router lift
The router lift is dependent on the type of motor you have. Some motors are designed to be used solely in router tables, in which case some means to adjust the height of the bit is required. This is typically in the high-end tables whereas the lower-end approach is to take a ‘regular’ router, flip it upside down and attach it to the table. This is where the insert plate comes in to play because it’s this thing that’s actually holding the weight of the router. But since the high-end purpose built kits can easily be £800+ (and I will use this infrequently) I wanted to go the custom-build route and do as much myself as possible. For instance, the off-the-shelf base/stands are mostly just powder-coated mild steel with wheel-kits. All very nice, but nothing a few 2x4s couldn’t do. The router table worktop is important - it needs to be an appropriate size and it must be flat; but again it is mostly just laminated chipboard (some with a phenolic ‘anti-warp’ coating) or even cast-iron- but I had saved an offcut of kitchen work surface which was moreorless perfectly-sized for this.
Determined to do this on a budget, and with the base and worktop taken care of, I spent a not inconsiderable amount of time procrastinating about what to do next. The extent to which I went around the houses and changed my mind would be of limited value to this blog, but believe me when I say a lot of thinking time was wasted / expended on it.
My original thinking started with the premise that I have a Bosch GKF600 palm router which, in simple terms, I was not completely enamoured with as a handheld router. I find the height adjustment to be incredibly imprecise and, frankly, annoying. With a variety of bases available, I figured I could use it as the basis of the router motor for the table. But I was nevertheless left with the issue of how to adjust the height, which, when upside down and inside a router table, would surely only become more of a nightmare.
Cue more back and forth as I flipped between the various bundle kits, the second hand options, the all-in-one tables, and everything in between. One issue with 2020 / lockdown / Covid has been that most tool suppliers have had serious stock supply issues. So to do this in August (ish) 2020 meant not only figuring out what I wanted to do, but trying to do it within the boundaries of what was available. The big issue was how to have a table-based router but also have decent control over height. Table router lifts are a thing - but they’re insanely expensive.
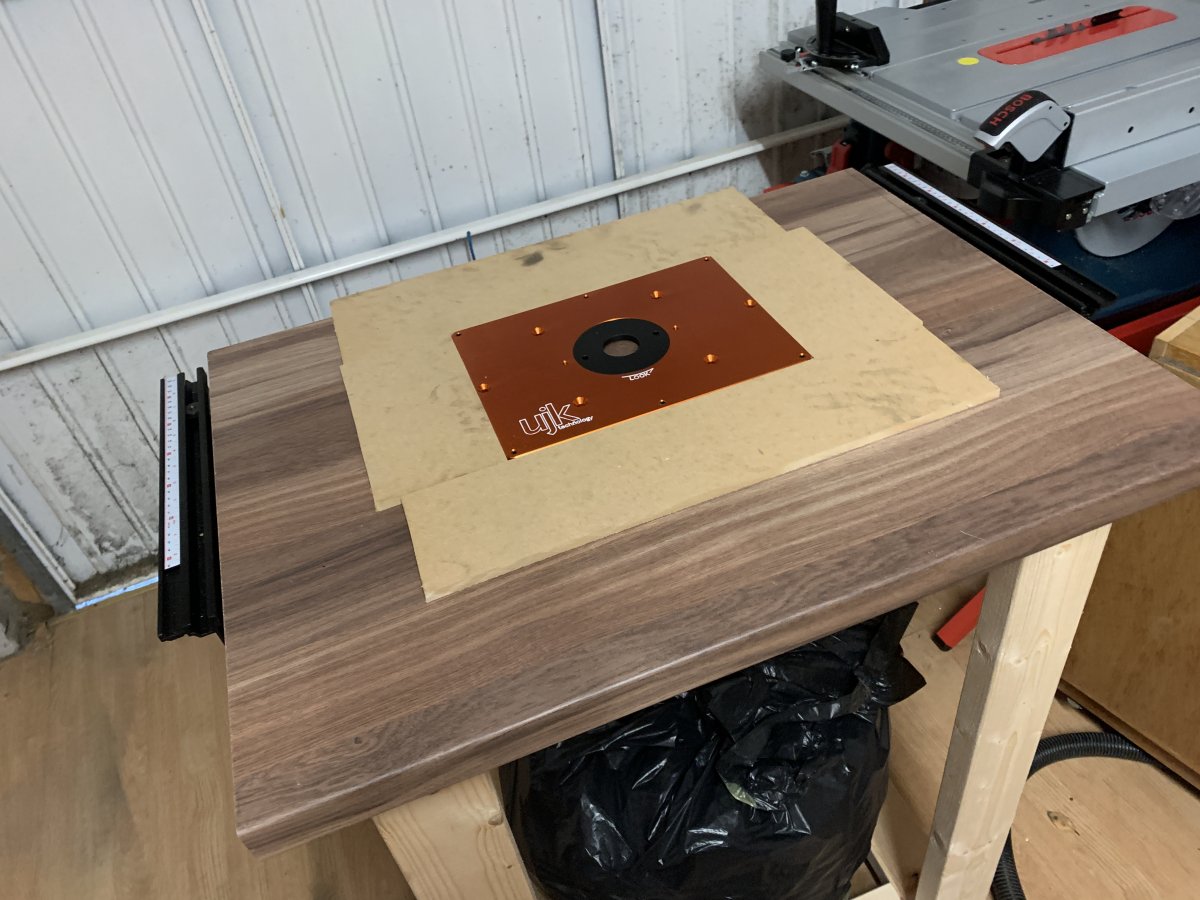
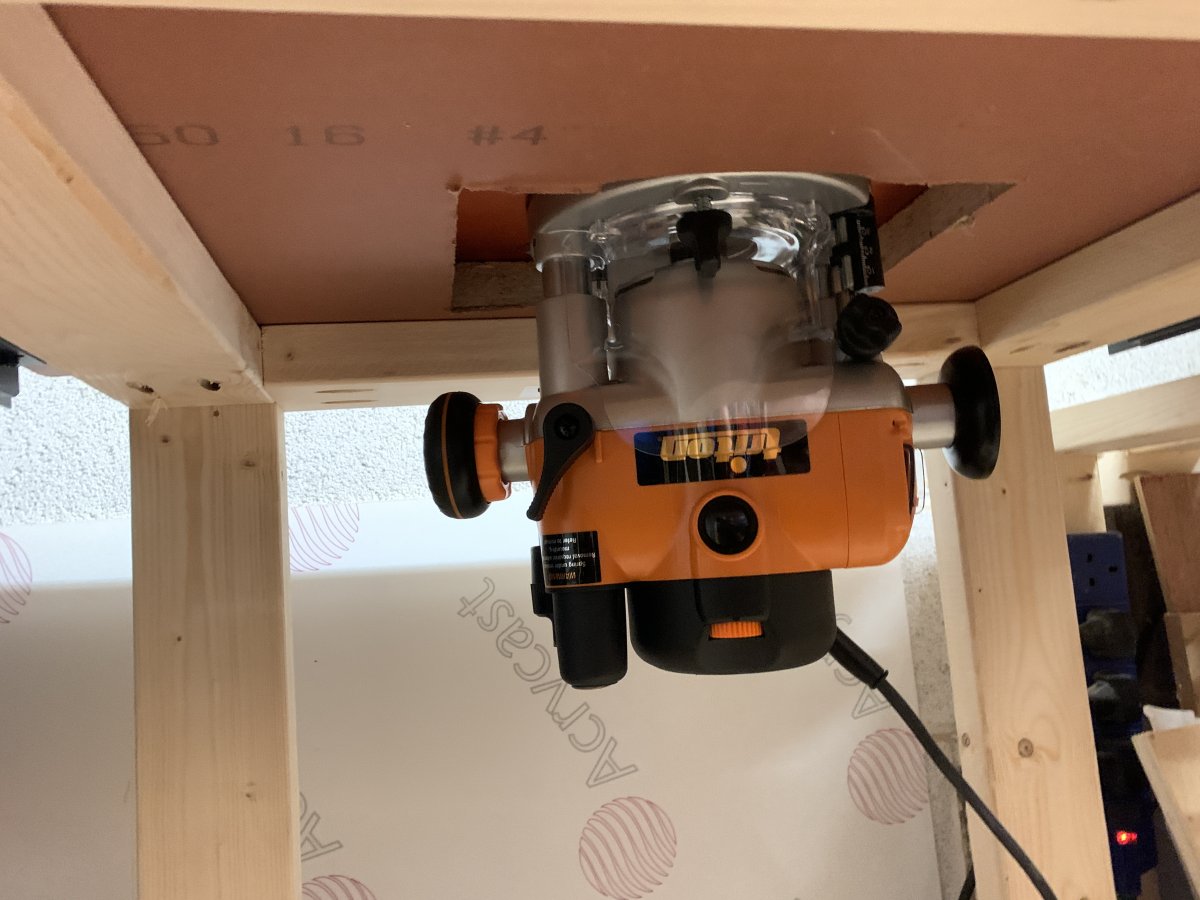
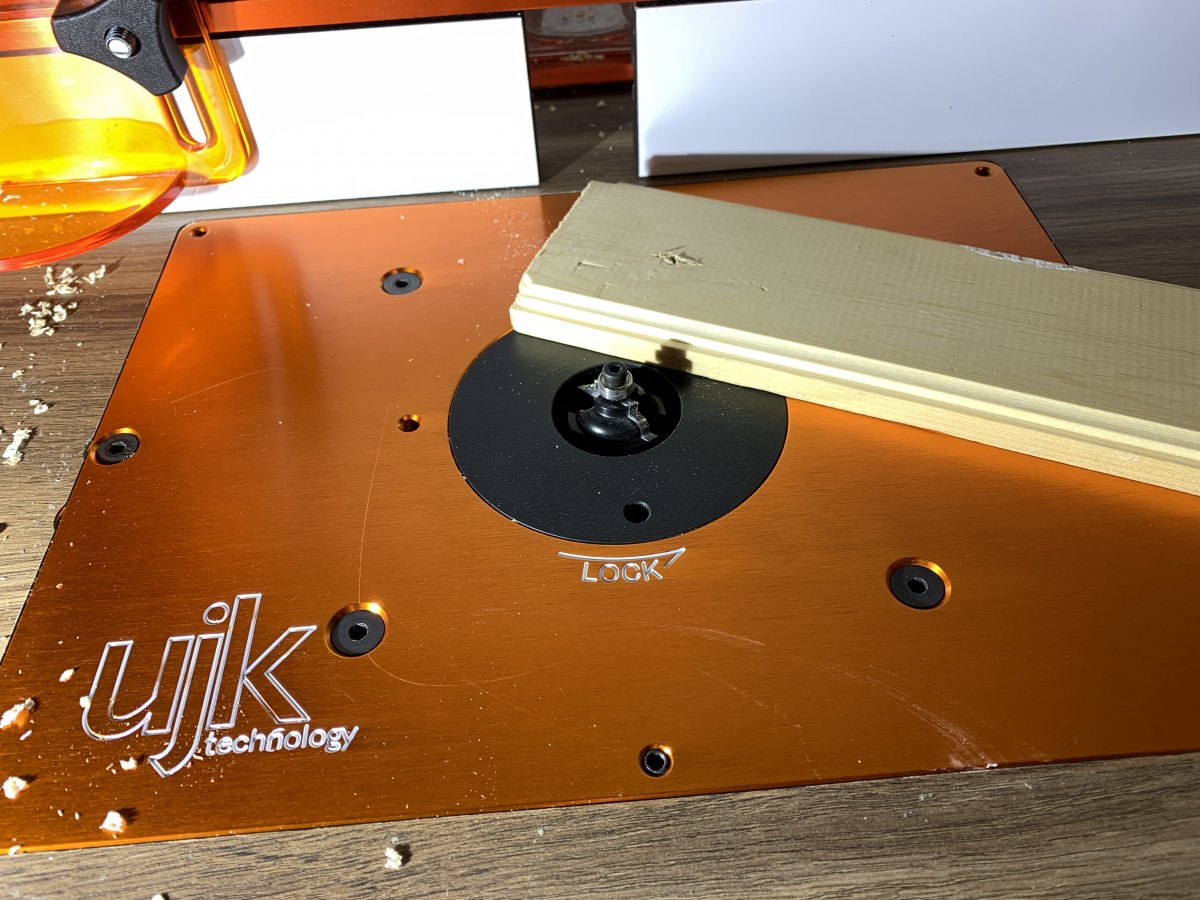
Then one day I stumbled over the Triton TRA001. A comment on the thread I’d started on UKW pointed out that it was designed with a router table in mind. That it actually came supplied with a lift arm for use in a table. This seemed to solve all my problems. The Triton is not cheap, but it is also not break the bank expensive, especially when it meant that a lift was not required. All I needed was an insert plate and a fence and I was good to go. I hastily went for the UKJ table insert and fence from Axminster Tools, and before long, I had everything I needed. (Or so I thought.)
The base itself is very basic and is designed to match the other stuff I’ve put in my garage for a workbench and the mitre saw. (At this point, I’d not found a home for the table saw.)
The router table was to serve the additional purpose of outfeed for the other side of the mitre table. I don’t in any way claim to be an expert in joinery; and, having spent much time dithering, I’d annoyed myself to the point where I decided that just having something that functioned as a table was the objective (as opposed to losing endless hours to the minutiae of how it would all work.) Hence the open front-design and so on - if turning it on, adjusting the height and changing the bit was a bit more of a pain in the arse to begin with, then so be it - I’d soon figure out what I wanted from all this…
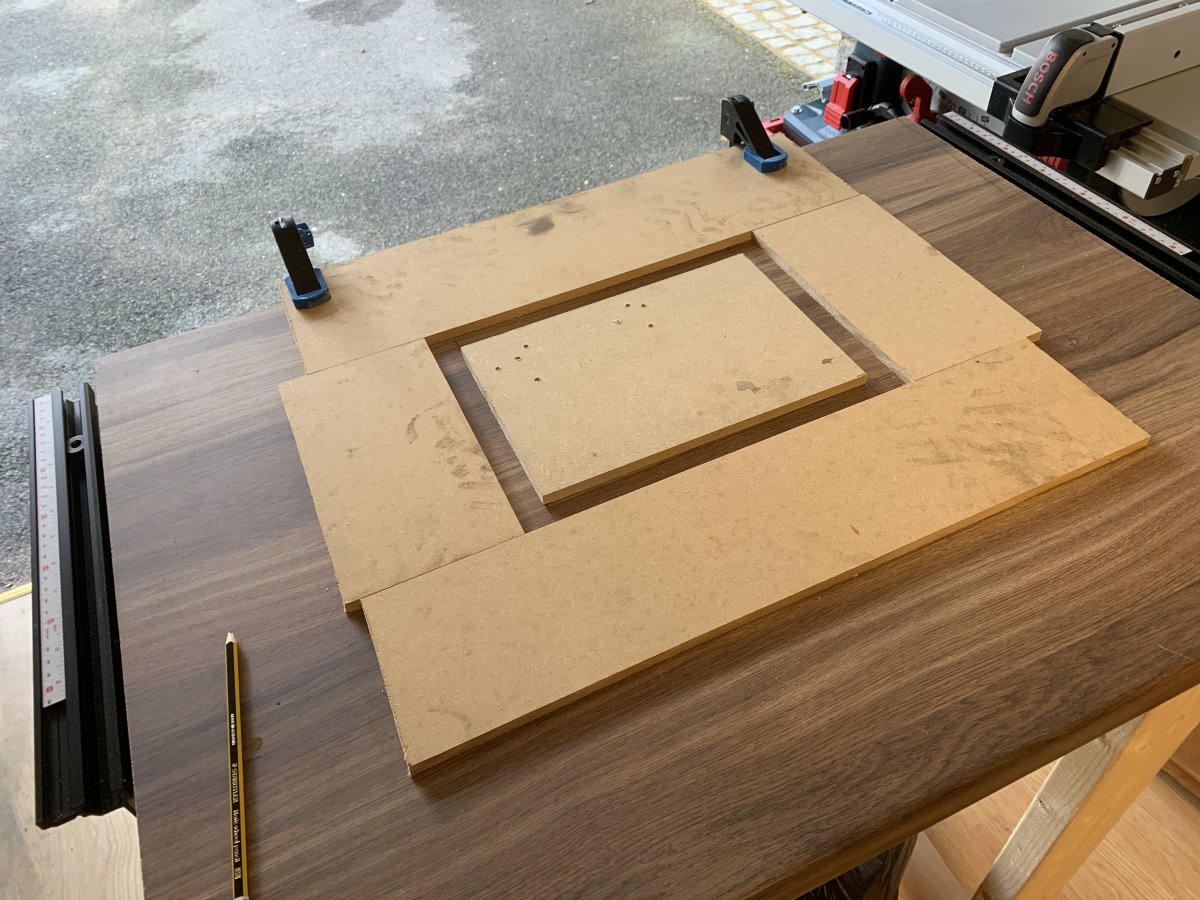
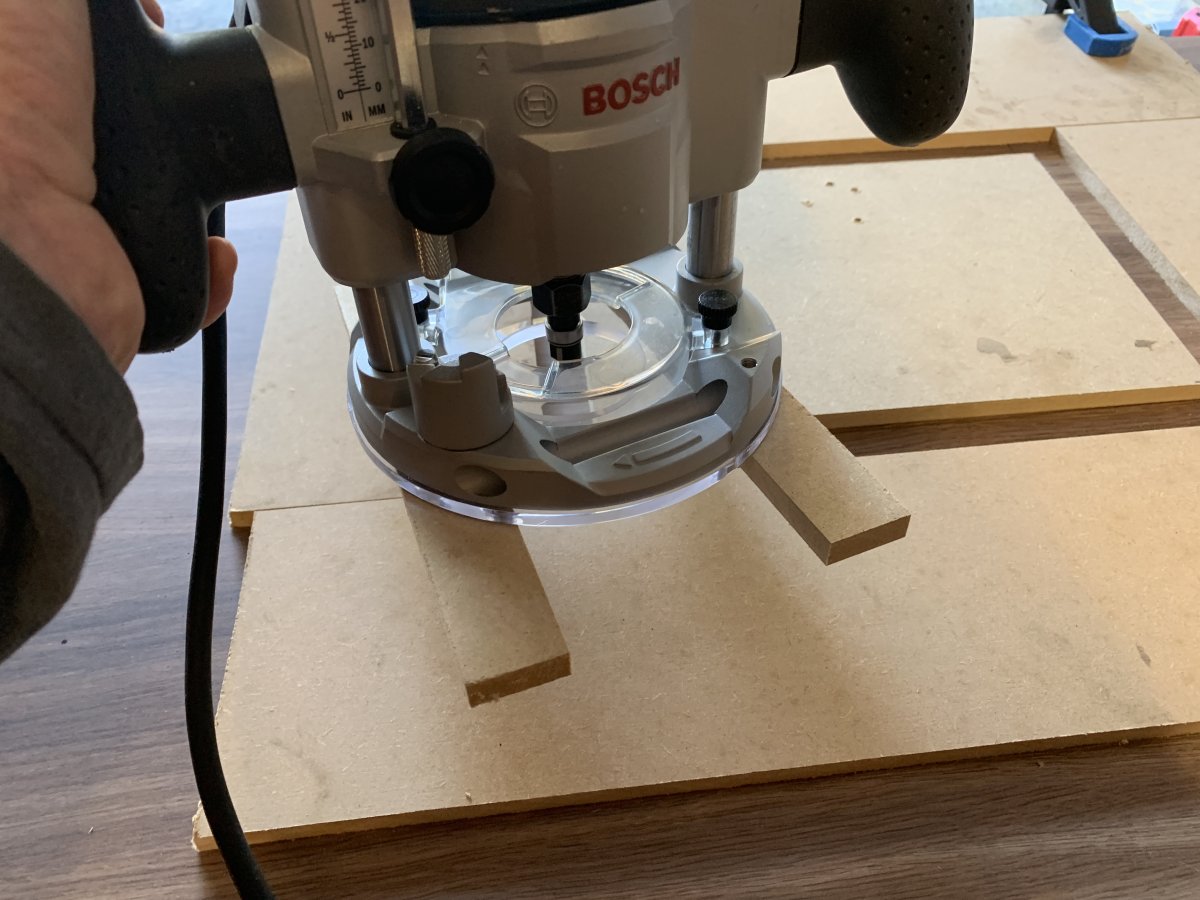
So the next step was to attach the router to the plate - and this meant the plate had to go in to the table. Which yields the ironic part. I opted to use the Bosch router in the plunge base (and a new router bit from Wealdons) and, if I’m completely honest, this whole thing couldn’t have gone much better. I did the usual research (Google / YouTube etc.) and in particular found this which provides excellent guidance. I’m not saying it went absolutely perfectly, but the end result was more than passable.
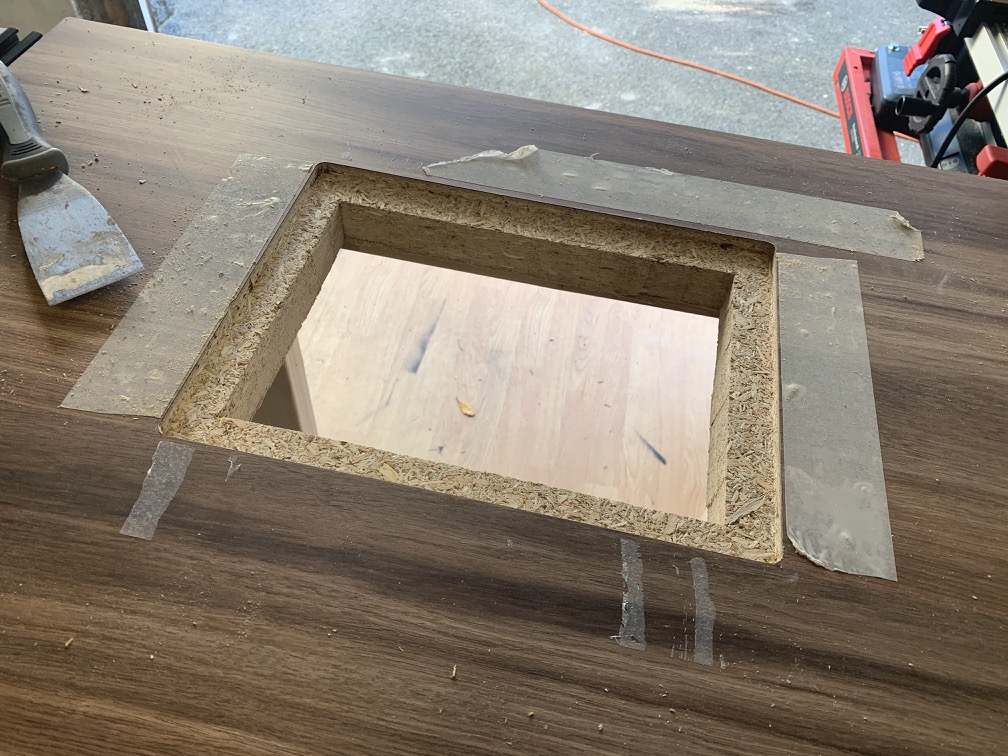

I ummed/erred with whether to put something beneath the levelling screws… and in the end I cut small holes and put some mini washers beneath just to stop these digging in to the chip.
Next was to attach the router. Preparing the Triton for the table is fairly straight-forward - you have to remove the plunge spring and then depending on which insert plate you have, figure out where it goes. The UKJ universal sub-base / plate had holes and so after a little fettling it was in…
And so, it was done. I have a perfectly functional router table, which, I am fairly certain will be more than enough for my needs.
However… I did learn some lessons along the way, and, if was to do it again, I would probably do it differently.
Firstly, on a practical level, if using the Triton router, I would not buy the UKJ insert plate. The Incra MagnaLock is about the same price but it has a hole pre-cut for the lifter. I have looked at drilling out the UJK plate to allow the lifter through, but, it’s a thick plate and I don’t trust myself to do a proper job on it. This would all be saved by just starting with an insert designed for use.
(To the extent that I have now bought the Incra; but the dimensions are different… there is no way to get it in the current table without making a complete mess and patching… )
At the moment, adjusting the height of the Triton from underneath is not a big deal, but I have the feeling that if it gets more use then being able to use the lifter arm will become more of an issue at which point I will see about installing the Incra.
On a similar subject, there is a fair bit said about the shank-lock that exists on the Triton and even a workaround for removing it. I can sort of see the rationale for doing it, but frankly, the auto-lock is helpful. Sure, you have to power off the router before changing bits… but then, that’s just good sense. You wouldn’t change the blade on any other tool/saw with the power/battery still enabled, would you?
Finally on the subject of the Triton (and I think this applies to others, not just the TRA001) but it’s an impressive router, especially for the price. Sure, a few of the exterior bits are quite plastic-y but it feels solid and well built, and it really does make a delightful purring sound when powered up. I’ve got virtually now doubt that it will sail through anything I’m likely to throw at it. The only complaint so far, and I’m not sure if this is just a quirk of mine, is that it was supplied with two 1/2″ collets (as opposed to one 1/2″ and one 1/4″) which was a bit of a bugger when I discovered that the hard way, needing to cut something… two days before Christmas.
On then to the UKJ hardware. On the whole, I can’t fault the overall quality of the parts. The insert plate is excellent (albeit in unusual dimensions) but as previously noted, I wouldn’t choose it again. Maybe there’s a more suitable router for it.
The fence, is excellent, but, I must admit I’m slightly underwhelmed by the positioning aspect of it. Admittedly this is in comparison to what I’ve seen the Incra fence and positioner do - and these are a whole ballpark above in terms of price - but I guess I will always be sceptical of the accuracy of any fence that locks (independently) at both ends.
(It’s the main thing I was looking for in the table saw, and the fence on the Bosch is brilliant.)
I’ve no doubt you could achieve excellent results with this fence, but it seems like you have to be endlessly checking for square…. maybe I’m missing something…?
Nevertheless, there it is. Custom-building a router table with a Triton TRA001, and some Axminster UKJ bits / Incra bits and a bit of trial and error. Hope I’ve covered everything but do comment below if there’s anything that I should add.
Happy woodworking.