Home Office Build
Some words and thoughts about the process of building a home office in my back garden.
Background
I’ve worked from home from time to time a fair bit in recent years, but thanks to Covid this turned in to much longer and much more frequently.
You can cope with being surrounded by house shrapnel for so long (kids’ toys, dinner things, shoes, boxes, excess furniture…) but we hit a point where it became time to do something a little bit more fit for purpose. This was to double up as not only my home office space but also a bit of a man cave / sanctuary away from the spoils of normal life. Well that was the theory, anyway.
Nevertheless I wanted something functional, comfortable, officey without being too officey and definitely more than just a summer house with some paint.
Planning regulations in Guernsey are nowadays fairly supportive of these sorts of buildings - the Island Development Programme (IDP) encourages things that moves business activities outside of the major business centres; so fortunately achieving planning permission was straight-forward.
Unfortunately pretty much every building contractor in Guernsey is completely booked up until the end of time at the moment (lots of reason.. housing market being out of control being the main one) and building materials are 2-3x what they were a few years ago.
Executive shed
So having anything custom build was pretty much out of the question for budget and time reasons; I’m reasonably handy with a screwdriver, but not confident enough to build something entirely from scratch; therefore an ‘off-the-shelf’ building was the way forward.
And so all that was left therefore was to find a suitable building and… build it.
I did some research - which suggested that structural insulated panels (SIPs) are all the rage - and there are lots of companies offering these types of building-kits. However, with these being UK based and the various companies I contacted having little to no experience of delivering to Guernsey. Some also offered ‘panel only’ buildings - so you need to supply everything else. Not ideal.
So I ultimately decided to go with Dunster House (DH) since they actually have a local agent that would take care of ordering and delivering the kit. This did limit my options somewhat, but from a risk point of view this made most sense - if it didn’t arrive, or arrived damaged or there were any issues, then I can make that the problem of the local agent.
Their kits are also (allegedly) complete - supposedly everything you need other than electrics. As it happens, I did a lot more on top, but we will come on to that.
They have a nice range of garden office buildings and in the end I went for a 4.5m x 3.5m Helena. Their website is typically annoying with lots of the typical sales that are ending imminently (and then immediately restart) and always offering all sorts of discounts and free upgrades etc. The local agent just told me the price of the building which was OK so I was largely able to ignore all that fluff.
SO having ordered and paid a deposit the waiting began - would this thing actually turn up and would I be able to build it?
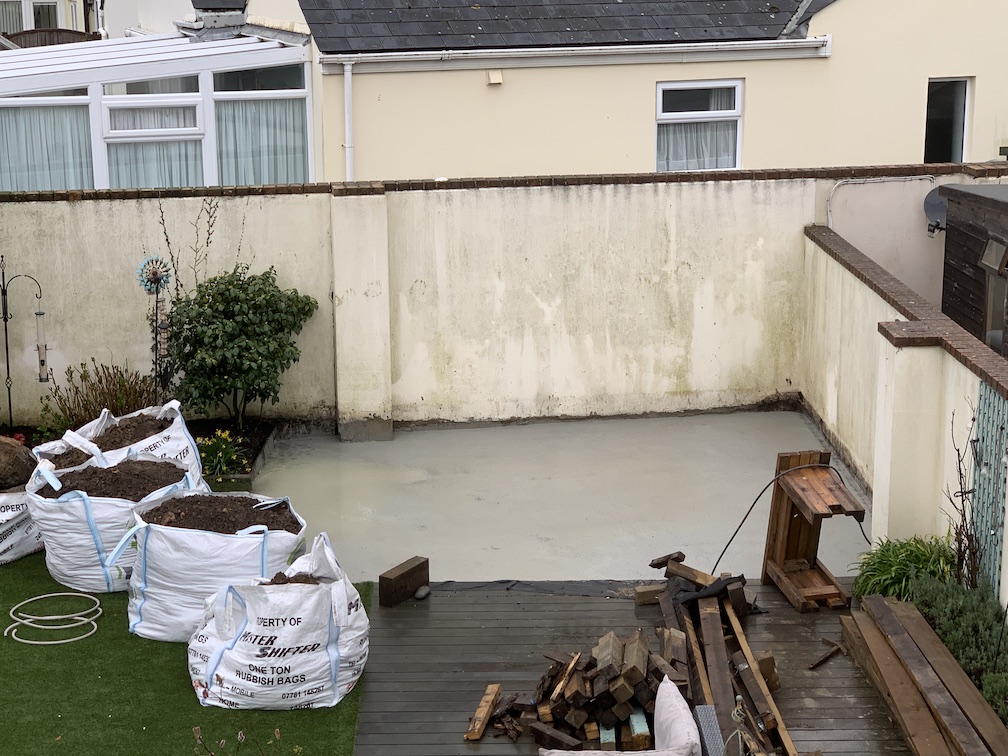
Groundwork
Whilst waiting for it to arrive, my attention turned to actually where it was going to go. There was really only position in our garden it would fit and in that position there was already a hot tub which we had long since stopped using.
(But this did mean I already had a 30A power supply to the area which saved one major job.)
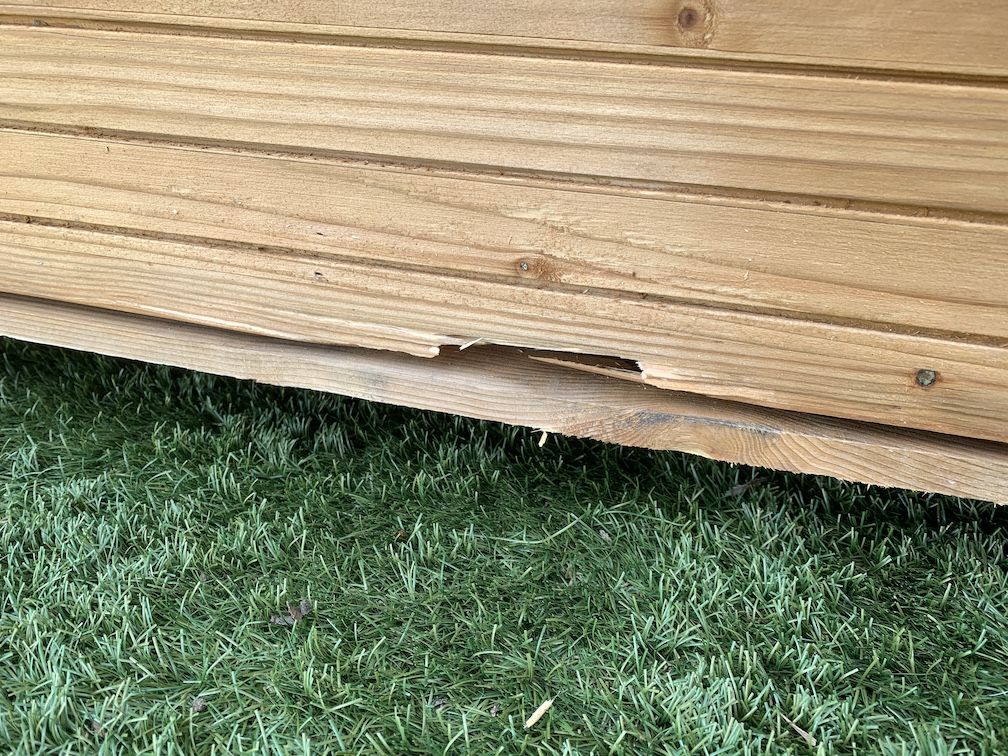
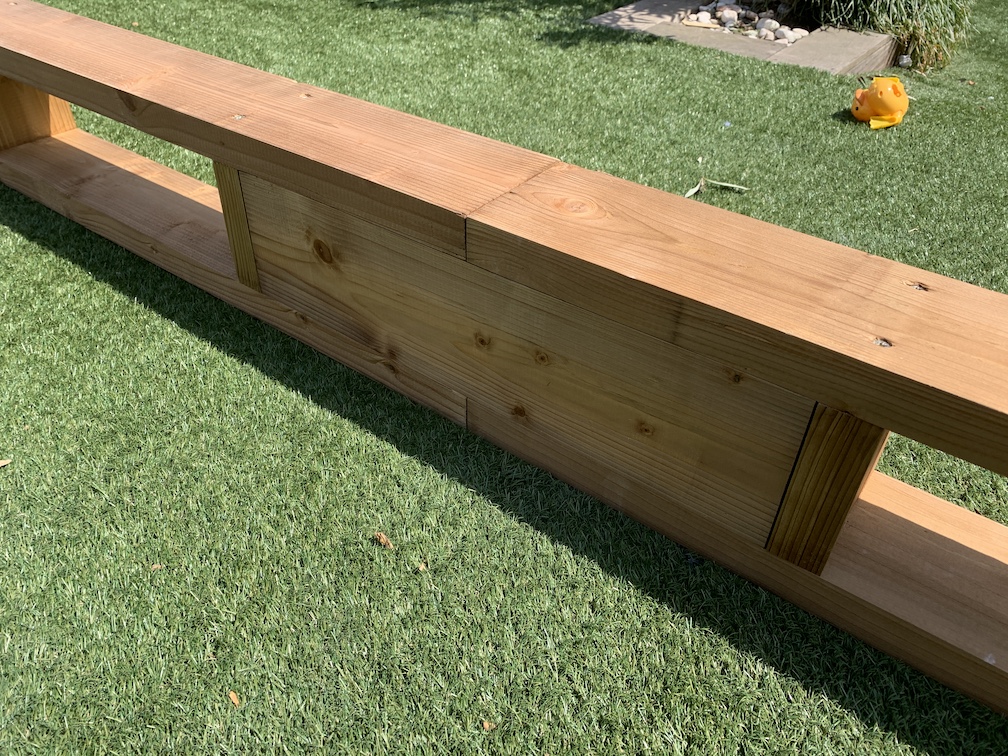
So the first job was to lift a load of decking and have the tub taken away.
I absolutely love this HIAB…
DH don’t provide much upfront guidance on what sort of preparation should go on other than saying it will go on a gridlock system (that they will of course happily sell you.) In other words, a concrete base is not required. I chose to not believe this and managed to find a contractor to pour a concrete base. I had measured (albeit slightly led by the dimensions of the deck) and whilst the building did fit on the concrete, I wish I had oversized the concrete pad to allow more room around it.
I also left it up to them to take of levels and we also agreed to not put drainage in. This was also a mistake. I would definitely next time ensure it had proper drainage because my biggest fear is water getting under the building. To compensate, the contractor put a 30mm fall from one side to another to ensure any water didn’t sit; this ended up causing all sorts of fun getting the base of the building to be level.
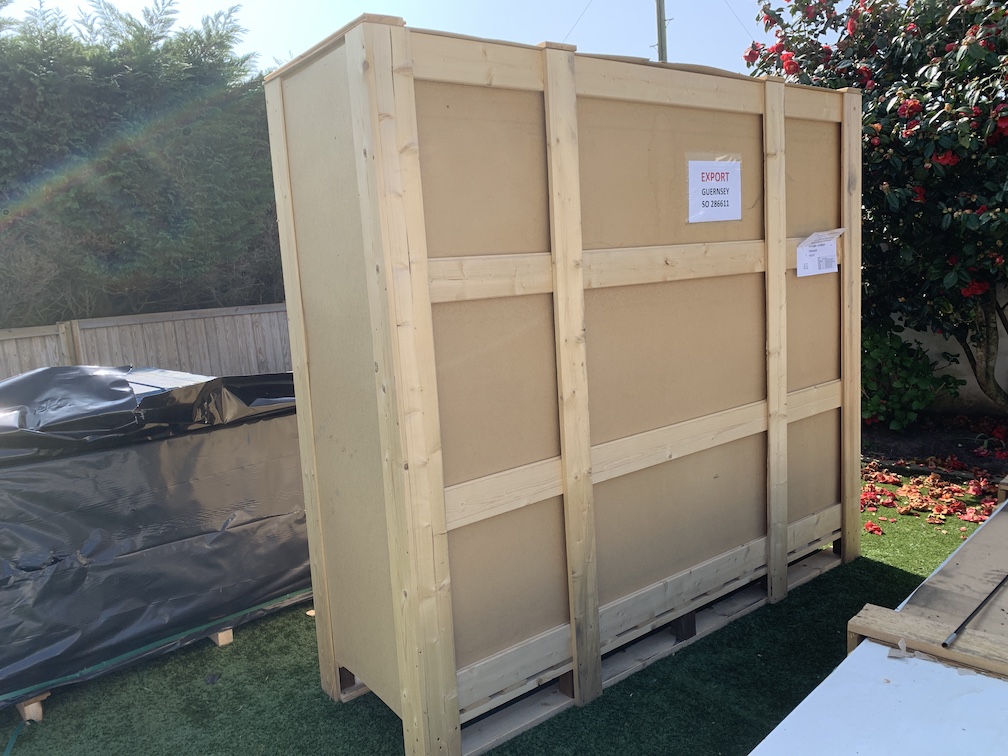
It arrives
The building arrived, on the very same HIAB that took away the hot tub. Nicely packed in a bunch of big crates.
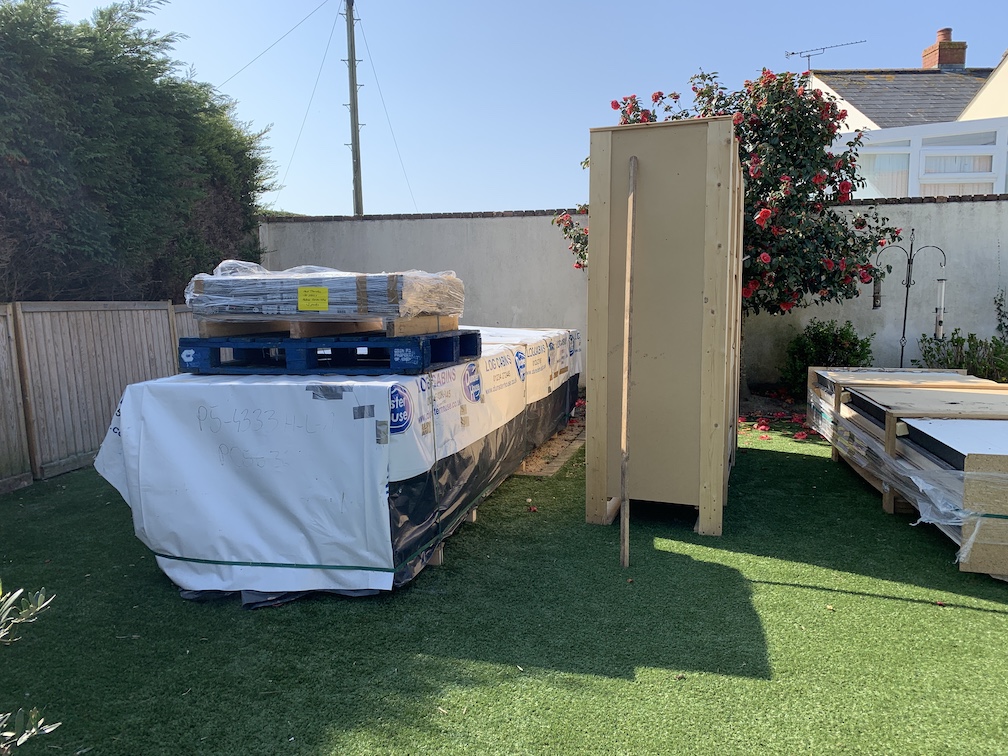
There was a little bit of damage, which was actually one on the main uprights. Looked like where a forklift had moved it. I figured though that I would be able to hide this as part of the build and so didn’t worry too much about it.
Beyond that, I can’t fault any of aspect of this - everything was very well packed, all the PVC window units were in tact. The merest issue was that they bury the packing list and instructions right in the middle of the packaging so ticking off to make sure everything had arrived meant opening everything up.
Commence the build
The first and probably most important job is to construct the base. If you get this square and horizontal then everything else should go reasonably well.
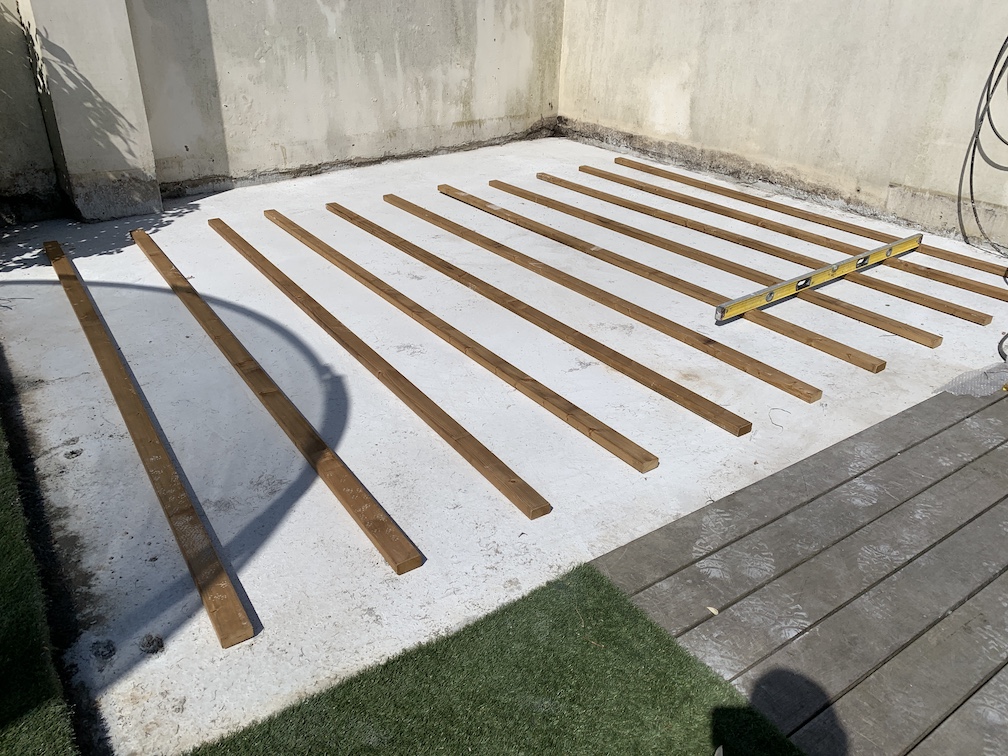
This is where the ‘fall’ in the concrete caused a lot of issues - 30mm doesn’t sound a lot but it really is in this context.
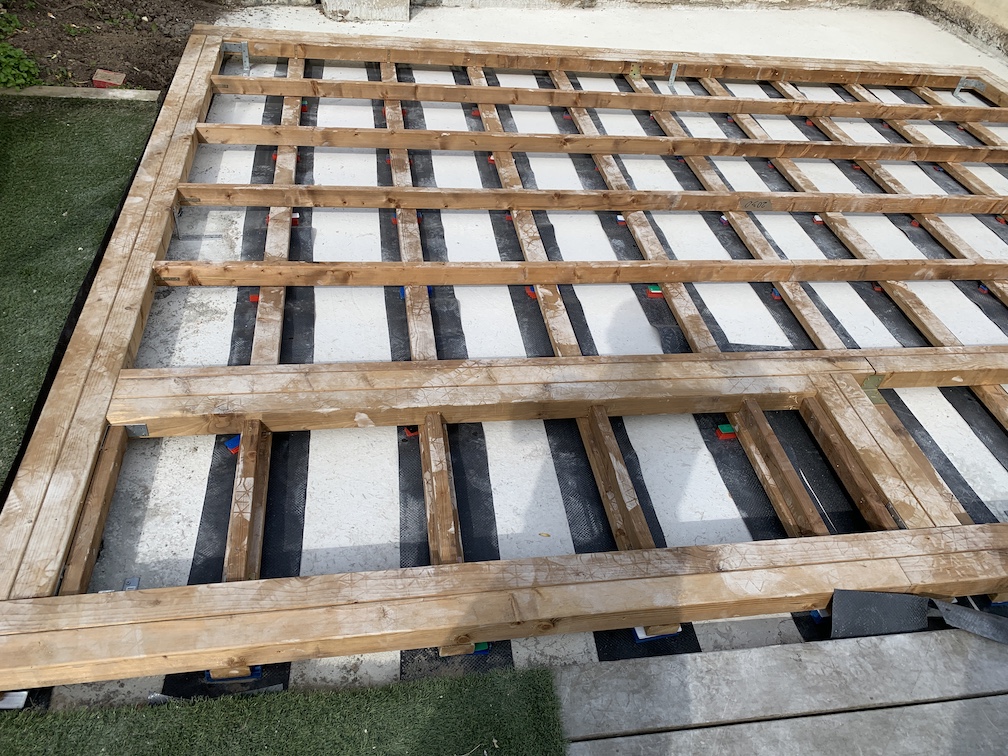
You can see the number of plastic packers that were required to get it all level from right to left.
Despite DH not mentioning it, I chose to use a DPC (damp-proof course) under the main bearers so that even if water gets under (which it will) then these wooden bearers should be protected from it and won’t be sat in water - and should prolong the life of the building.
Posts & Walls
With a square and level base, you start building the outer structure. This starts with the upright posts and a lintel.
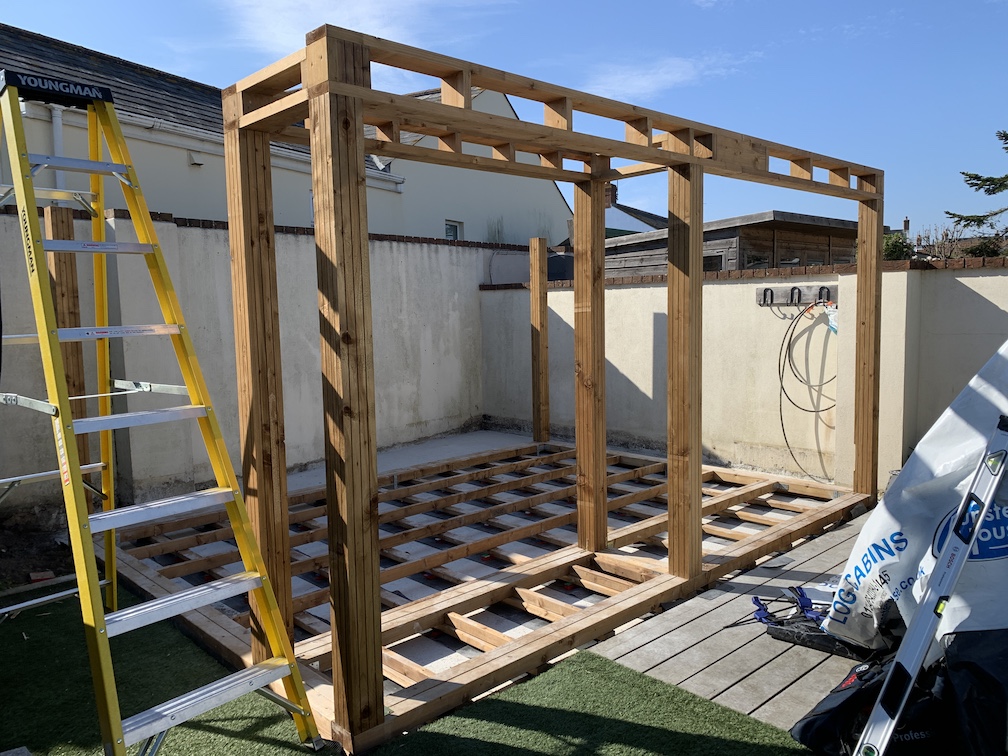
There’s nothing complicated here other than making sure they go in straight and square. DH provide a mixture of brackets but I supplemented these with a few extras (bent galvanised steel) as the build went on.
This is where you make quick progress, as the walls go in fairly easily. I was doing this on my own, so having a bunch of quick clamps acted as spare hands.
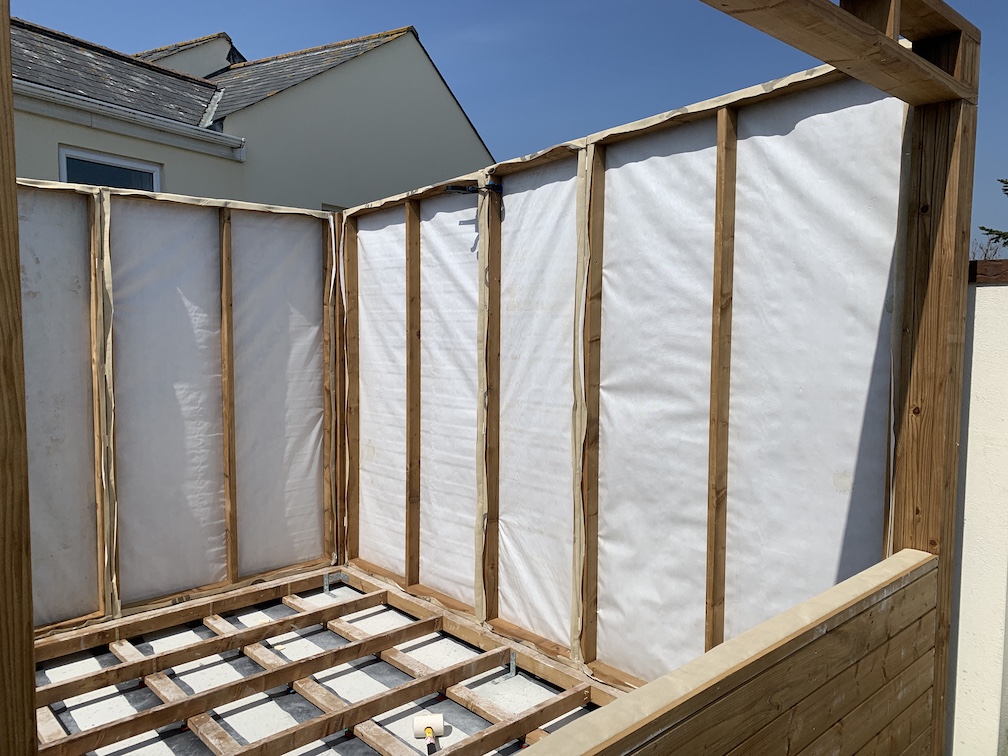
Roof
With the walls in, the roof can then go on. This is definitely a 2-person (or more job as they’re 100mm insulated sections; not only do you need help getting them up and in to position (made a lot easier by having the surrounding wall!) but you also need to adjust front to back to get everything square.
This is probably the hardeset job of the whole build. Getting everything square and true and in the right place; and then figuring out how all the flashing works. I think we didn’t position it correctly as despite following the instructions, the overhang on the right edge is different on the left. We ended up having to modify the flashing (with a grinder) for it to fit OK. This means the profile of the roof on each side is different, which can’t be right.
It is nevertheless wind and water tight, so I’m not too bothered.
Doors and windows
PVC next. I had zero experience with this so was luckily able to phone a friend. As it happens, other than not smashing the glass, it is relatively straight-forward and just takes a LOT of patience. (And finding the window packers that were hiding.)
The PVC is delivered without glass in place (for obvious reasons) so the first job is to build those; this is just a lego set. You start by installing the PVC frames. There is plenty of room in the recesses; which means a lot of gaps to fill.
You then offer up the glass to the relevant sections and spend a lot of time trying to then get it square and level. You use packers to incrementally adjust the top, bottom and sides until the glass sits nicely in the frame; and then lock it in place with the frame sides. Patience is the key here.
Inner structures
With the outer walls and roof on, and windows in place the remainder of the outer jobs are to attach trims and supplementary fillers.
I filled every gap I could find with clear silicone which took ages. But with that done it was time to go inside.
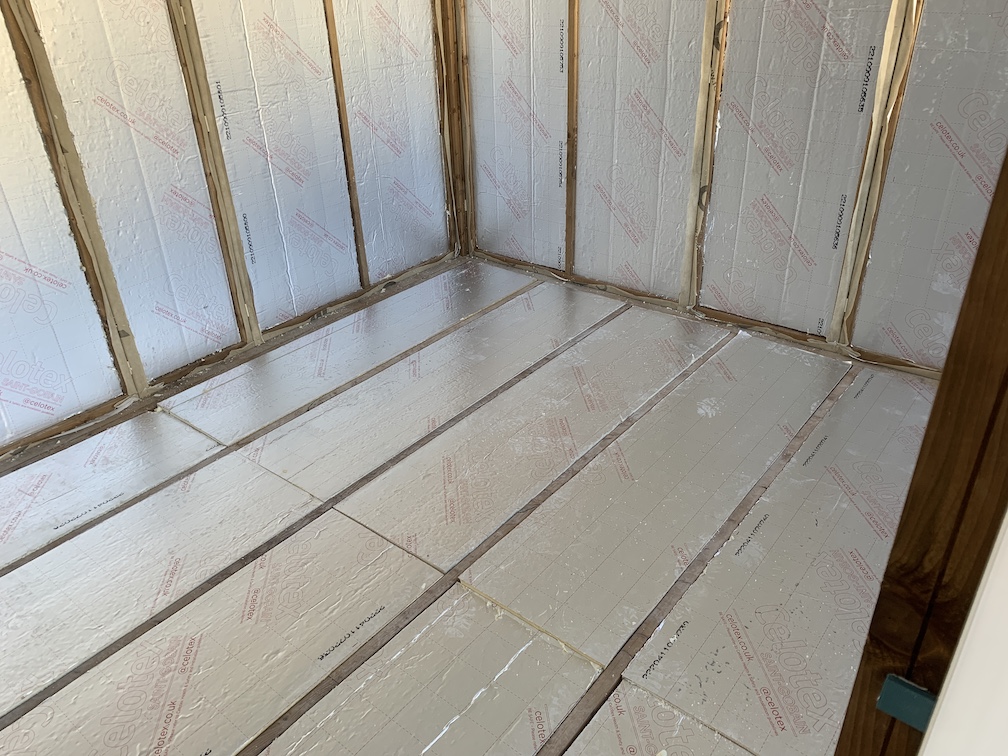
The inner wall panels are themselves insulated. However, there is plenty of room in the walls and floor for additional insulation. I’m actually not too bothered about the cold; moreso the heat in the Summer. My theory was that additional insulation may help to regulate temperature all year round and even off any extremes. I’ve no idea if this will actually happen, but nevertheless I filled the walls and floors with additional insulation.
If you’ve never installed it before, it’s quite a fun job… measure the size of the gaps and the thickness, and then start cutting. I started with a small jagged knife, but in the end a regular large saw did the best job. It’s not a neat job, but you never see it so it doesn’t matter too much.
At this point, I loose fitted the walls to see if everything was actually going to go in.
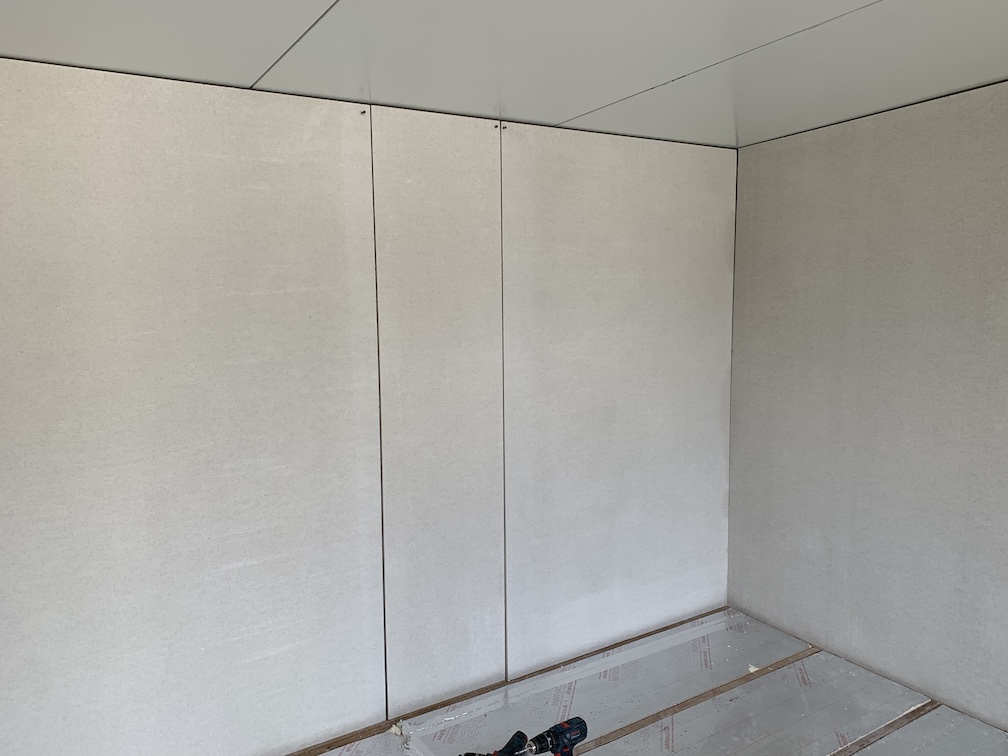
I then realised that I was never going to be happy with the finish of the walls. They’re supposed to be ‘fine’ as provided, but it’s a chalky finish style cement board which would not be very nice. Maybe they expect you to wallpaper or paint over the top, I’m not sure. But they provide plastic trims to infill the gap between the panels. This would have been rubbish, so at this point I realised I needed a plasterer.
However, this was the time for first-fix electrics and guessing where I’d actually want stuff like sockets and lights… and I just went over the top with sockets and switches everywhere (including for a TV on the wall.)
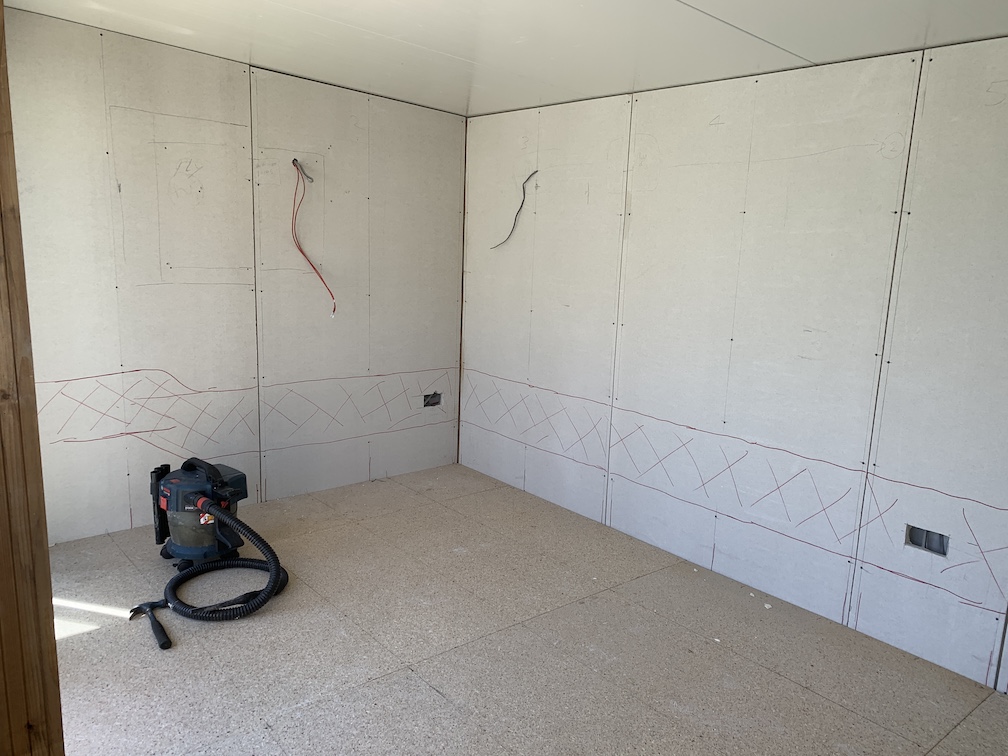
I could then get the plasterer in, who… plastered it. I get asked a lot of questions about this… so,
(1) yes we used a bonding agent on the walls prior to plastering them. It was this horrific black goo that was filled with grit. I can’t find the exact product we used, but it was something like this. We also used some plastic trims/beads over the joins between the cement board walls and at the joints with the ceiling (and other places) to give the plasterer something to aim at, and (2) so far no, I’ve not had any problems.
The plasterer was a little concerned but ultimately seemed pretty unfazed by it, and it was all done within approx 6 hours. The main issue was stopping it from drying out too quickly (this was summer, and it was hot) and so I think he used a slightly more watery mix than usual. So it took about a week before it was fully dried. Since then it has been fine other than the occasional hairline crack which I suspect is more to do with when it’s really windy and the building does shift slightly.
One other thing to add to this is fixing anything to the wall. Unless you can remember where the studs are (my fancy studfinder really seems to struggle with the plaster and cement boards in the way), anything heavier than a small picture is possibly going to cause issues because it is effectively a hollow plaster wall which has no real strength to it. So before the walls went, I re-enforced one area where I knew1 I wanted a television; so put some ply behind that section to give it something chunky to attach to. In other areas (e.g., where the additional monitor) went, then using hollow wall anchors seems to have been OK.

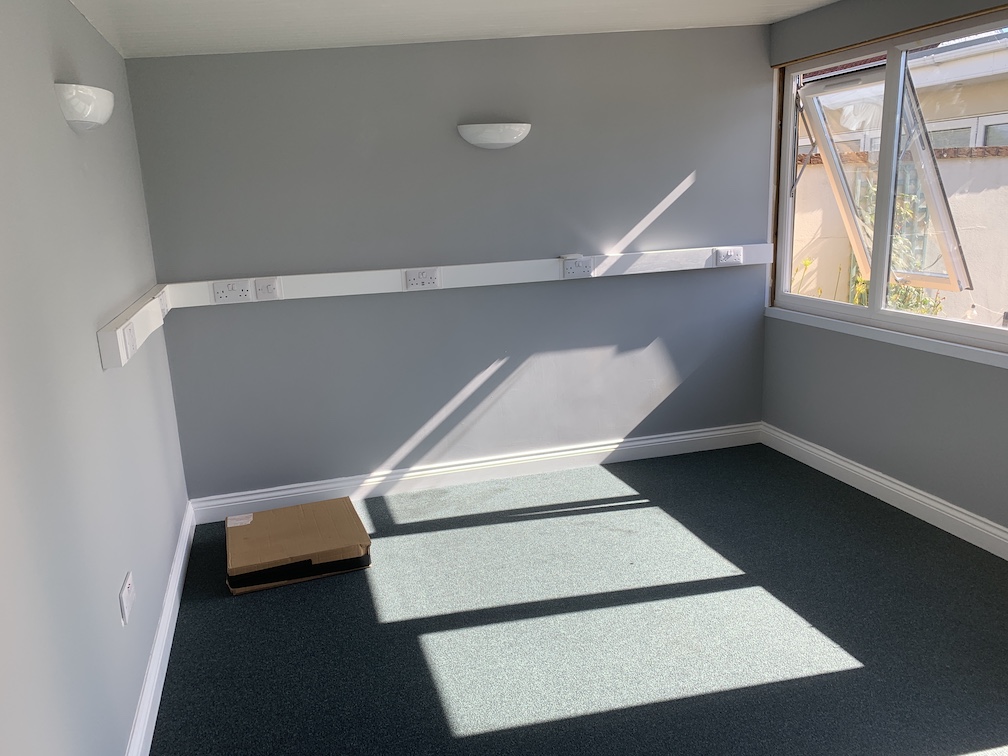
From there it was a case of painting - it was bare plaster, so needed a decent mist coat before top coat, which took a couple of layers… from there, skirting boards…
…carpet (tiles)…
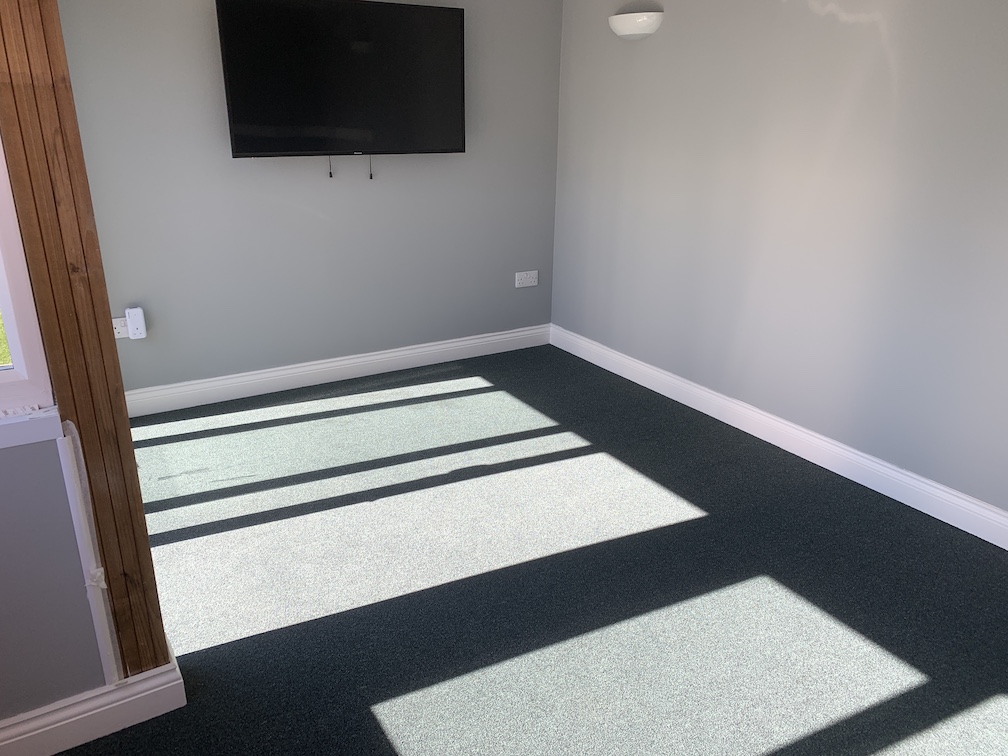
…2nd fix electrics…
…blinds (from Blinds Express)…
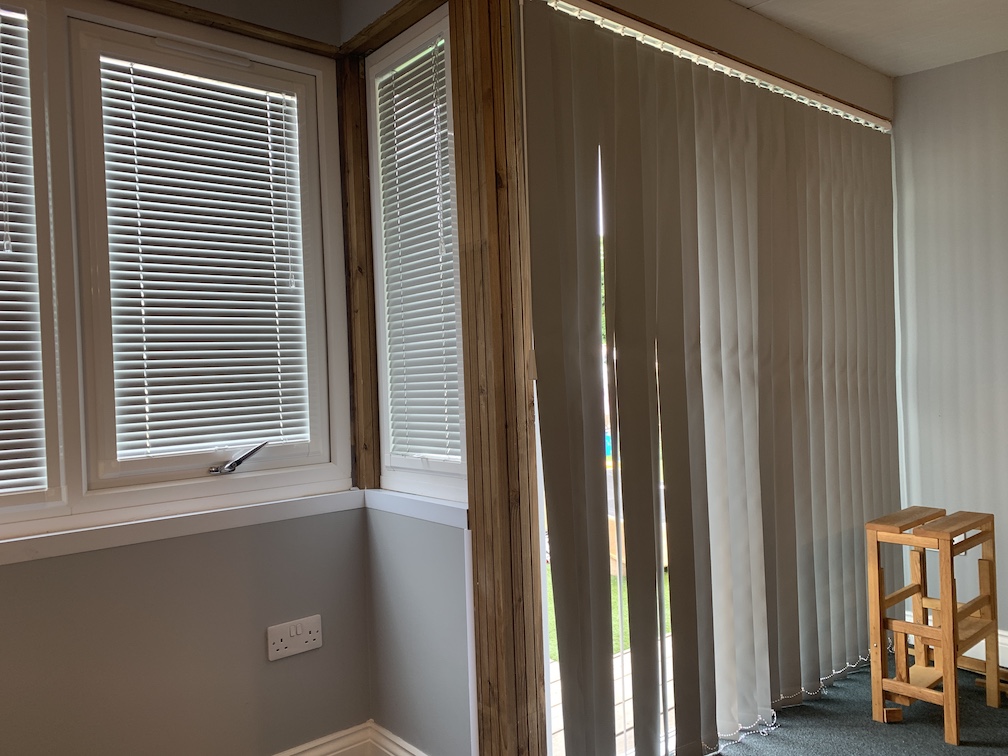
and we were mostly done and time to start moving in.
I custom built a desk using an oak kitchen worktop…
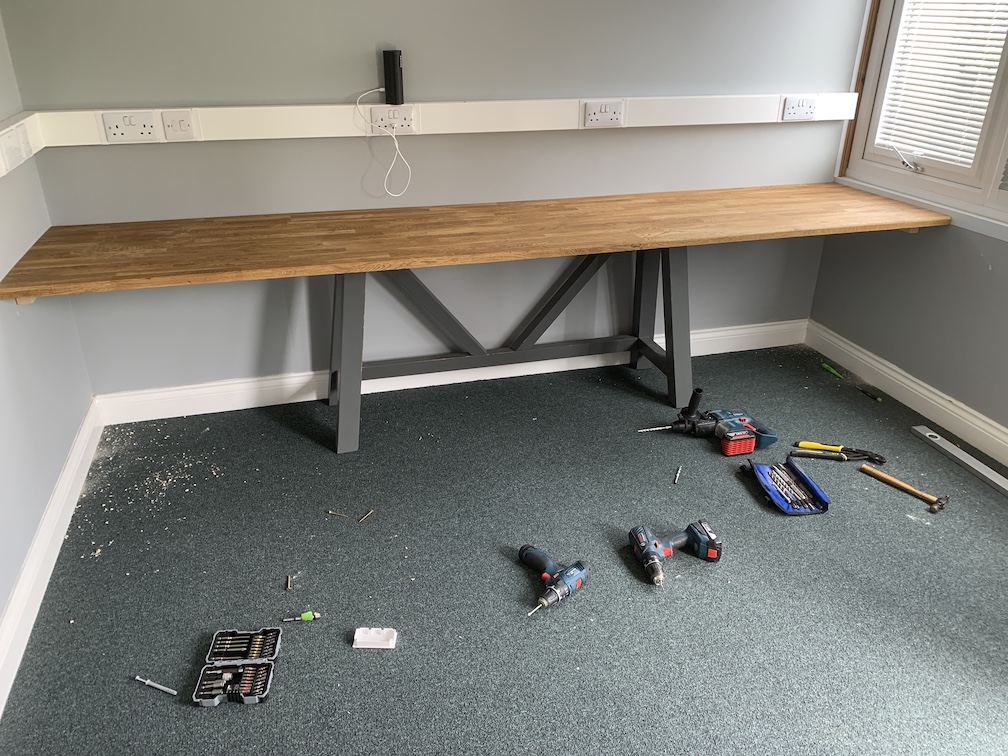
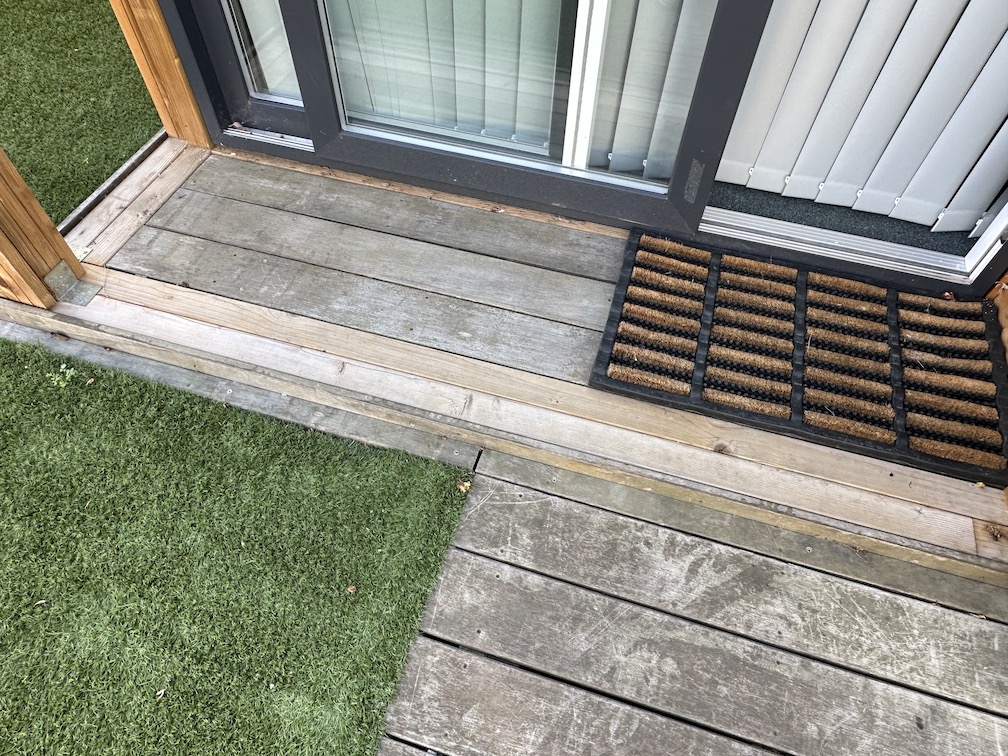
I trimmed the edges using off cuts from my decking so that it all joined up nicely, including the porch area…
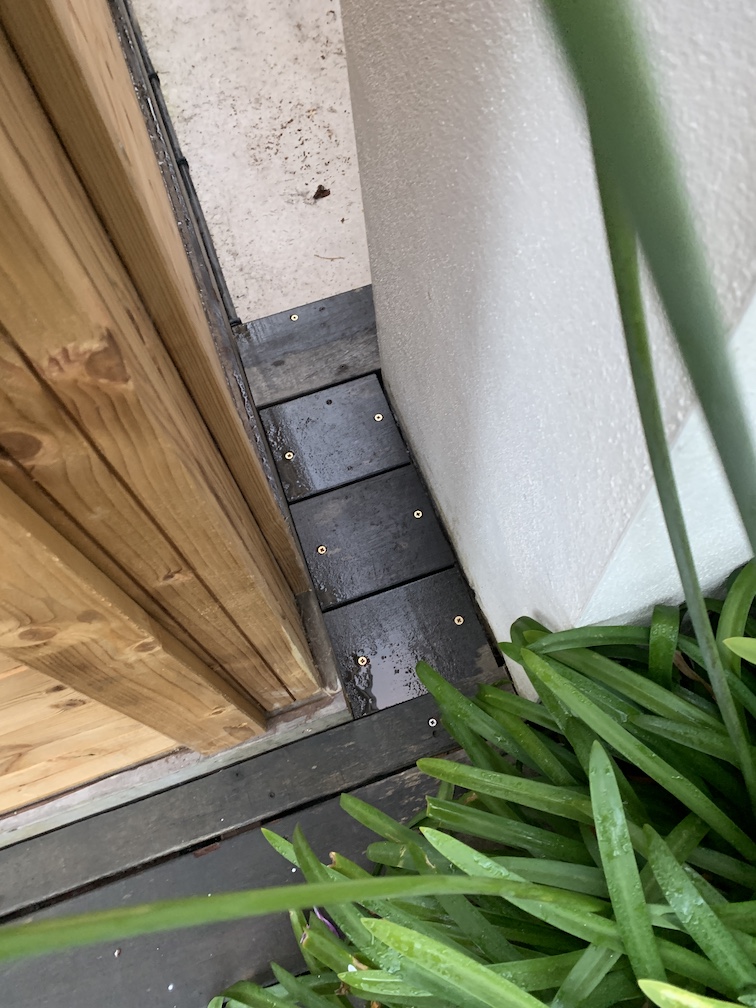
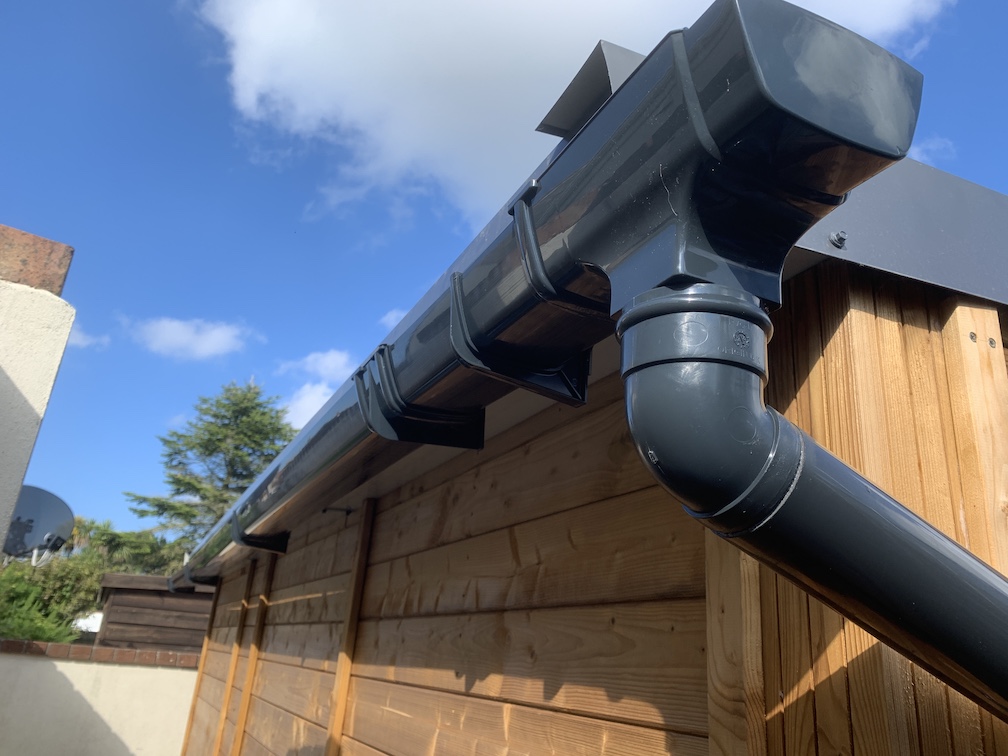
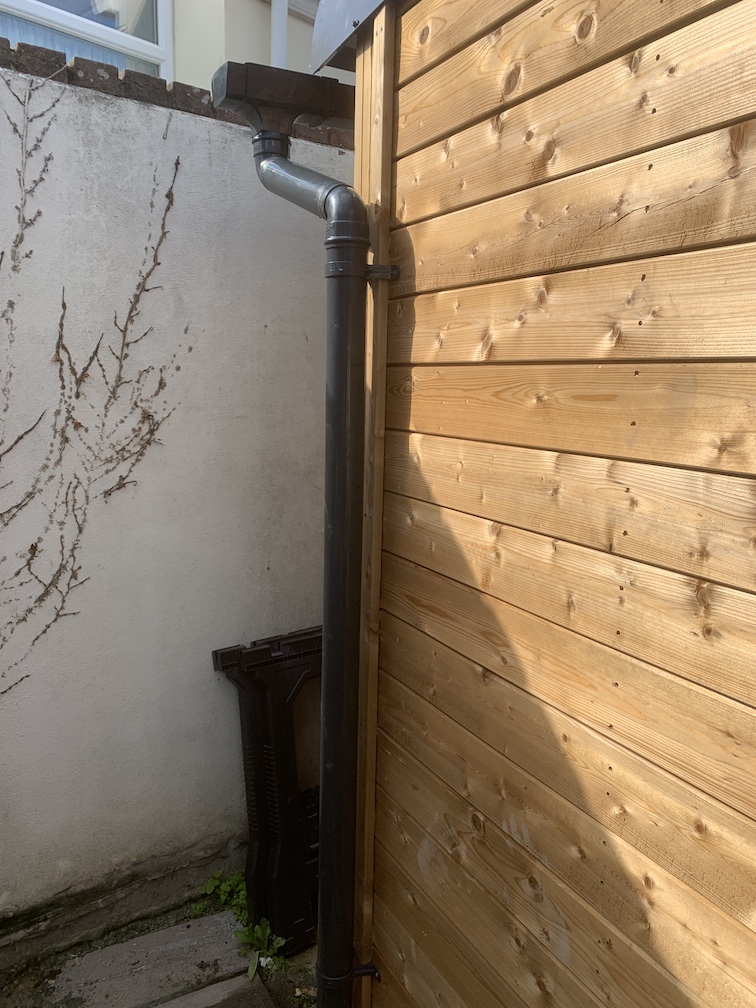
I also installed guttering…
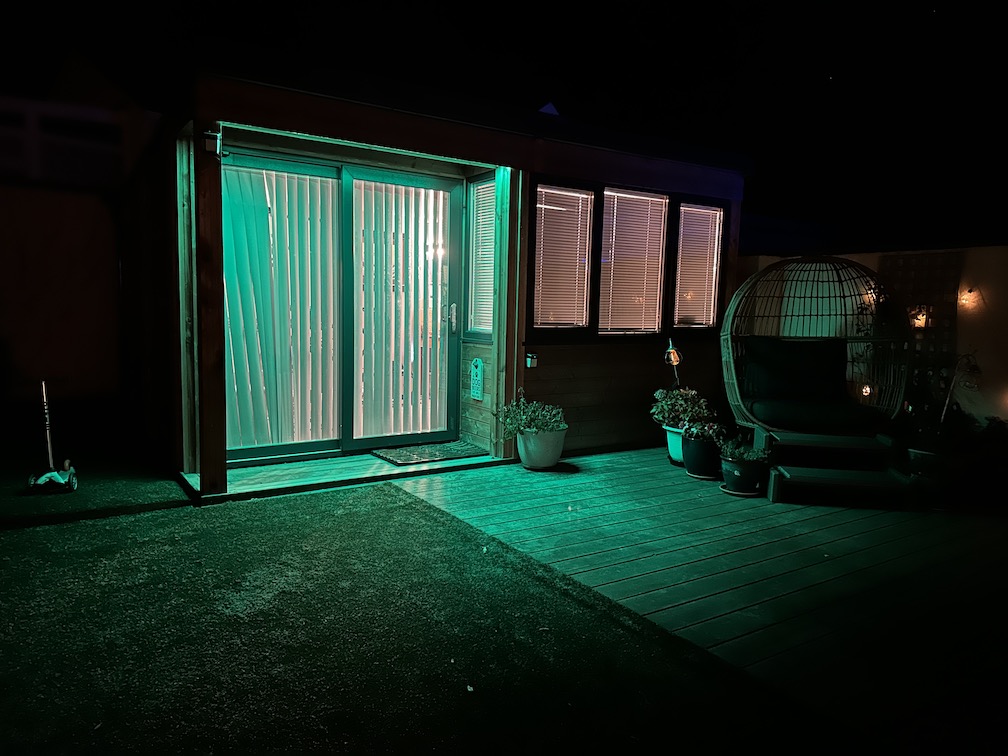
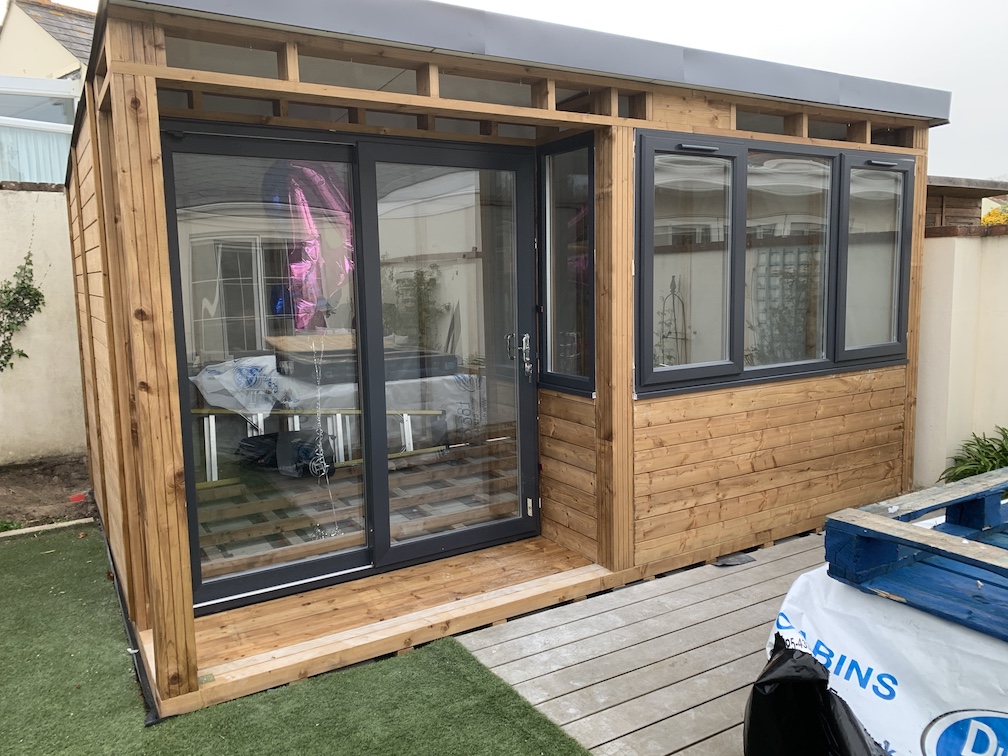
Finished
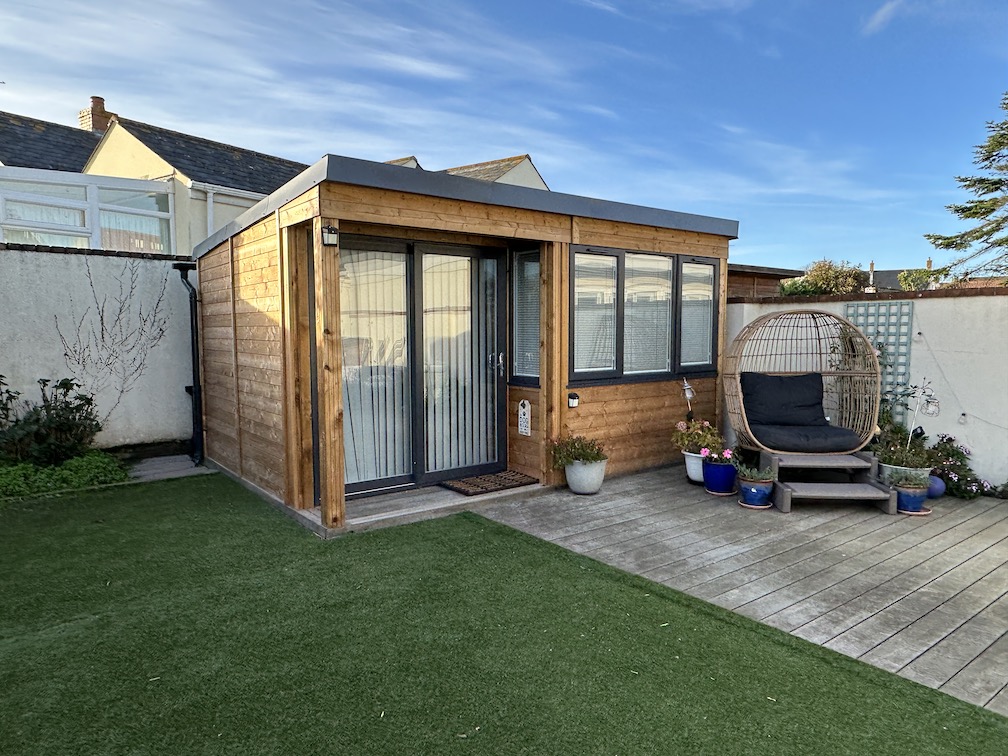
Outside
Inside
Final thoughts
If you’re reading this then chances are you’re wondering two things: (1) whether the Dunster House garden office buildings are any good and (2) whether you would be capable of building one.
I have only a limited frame of reference but I can say that this whole project has turned out considerably better than I ever expected, and everyone who sees it comments on how nice it is. It really is a nice place to be. I liked the design of the Helena building and thought the porch gave it some extra interesting detail, but would possibly go for the ‘Titania’ instead as really if you’re doing this the main objective is internal floorspace. I also probably wouldn’t go for that full width desk at one end, it’s not a very efficient use of space.
For the mostpart, I cannot fault the DH building. It’s very solid and any of my fears about it leaking or the roof ripping off at the first sign of any weather have not (yet) come to pass.
Pretty much everything you need is provided. Some of the components are a bit a cheap or could be improved (e.g. the crappy white plastic wall trims, the edging on the inner walls, the finish of the interior walls as I’m still not sure what you’re actually supposed to do with them as provided, the lack of DPC) but if you’re willing to work with these issues, innovate a bit and take it further then on DH kit really does get you 80%-90% of the way there.
In the end, I expanded on the kit building by:
- Additional brackets and supports in the main build
- Concrete base + DPC
- Insulate walls and floors
- Plaster the walls
- Guttering
- Additional exterior trims
As to whether you could build it, well I suspect if you’re even considering it then the chances are you probably could. I am reasonably handy with tools but have no experience of projects of this size; I did have help along the way from a carpenter/builder who was able to help me with the important / hard / heavy bits.
We did have to modify some stuff along the way, and in some cases modify what they’d actually provided but for the mostpart you really would get away with just some basic tools (drill, hammer, saw) and patience. The best advice I can really give (which is what I got told on day 1 of this build) - invest extra time and effort in to the base (of the building) to get it square and horizontal - do this and everything else should follow.
Vid
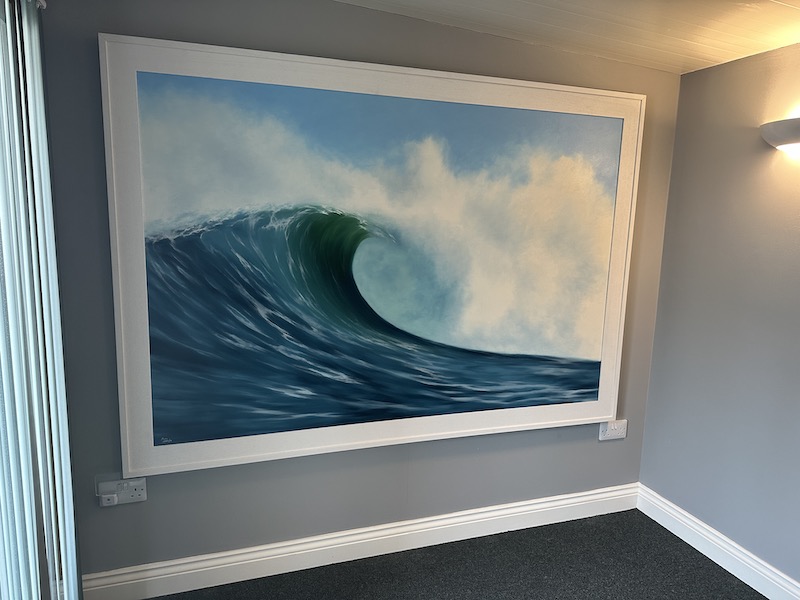
A rubbish and epic use of a whole wall
-
I’ve since removed the TV because I simply wasn’t using it… and replaced it with an epic original painting from local artist Sara Serafin ^^ ↩︎