Misc Ubuntu 20.04 on Hyper-V from macOS setup stuff
Not much intro needed to this one. Have recently binned our monstrous VMWare ESXi host in favour of a single monstrous Windows Server 2019 and within a matter of nanoseconds of doing a requirement came in that needed a VM building that would allow us to easy test some Java-y / Tomcat-y / MySQL-y stuff and rather than jump the hoops of doing this in Windows, figured an Ubuntu-y type machine would do the job, and rather than faff with VMWare decided to give Hyper-V a bash.
Not a lot to say about that, really, as in basically the same approach as VMWare… provision a VM, set some settings, disk size, processor, memory etc. mount some install media and away you go.
Ubuntu 20.04 installed painlessly and with a bit of keypounding soon got the environment up and running. But there were a few little things that always catch me out, that I thought I’d document.
The first, and not directly related to this, is to get ping up and running in Windows Server. We use a PiHole for DNS shaping but also as a local DNS server so that we can use local hostnames. Ping is obviously a staple tool to figure out if things are alive and IP / DNS resolution is working. However, Windows firewall by default is configured to drop ICMP traffic, so you need to enable it (this is for IPV4)
netsh advfirewall firewall add rule name=“ICMP Allow V4 echo request” protocol=icmpv4:8,any dir=in action=allowThe next thing, again on the Windows host, was that it would see our NAS (as in it would show up in network devices in My Computer) but trying to access it (either by double-clicking the icon or by a UNC path) would fail. I found two tips… one was to enable insecure guest logins:
reg add HKLM\SOFTWARE\Policies\Microsoft\Windows\LanmanWorkstation\ /v AllowInsecureGuestAuth /d 1 /fBut also to actually used a name credential and allow Windows to have it. This came from a tip for a QNAP NAS, but this worked for our Netgear ReadyNAS:
- Open Windows Credential Manager
- Click on the Windows Credentials section
- Click Add a Windows credential
- Enter the name of your device, for example, MYNAS
- Specify the username as MYNAS\
- You can enter a password, or if you leave it blank, you will get popup box when you connect, and you can enter it there.
On the VM side of things, the initial frustration was that the VM was at a fixed resolution of 1152×864; and when viewed on my 4k monitor this meant it was ridiculously small. The only way I could find to fix this was a fairly ugly hack of a config file, that sets a resolution on startup. You need to edit your /etc/default/grub file and edit the GRUM_CMDLINE_LINUX_DEFAULT setting to include a resolution:
GRUB_CMDLINE_LINUX_DEFAULT=”quiet splash video=hyperv_1920x1080”Next, since Hyper-V was doing NAT for the VM, it popped up on our network as a machine in its own right, which meant I wanted to remote control it and not via the Hyper-V console. Ubuntu should support this out of the box, and should just need to turning on, but when I went to Sharing, the option to enable Screen Sharing was missing. I’m not sure if this is because I chose a basic install. Fortunately, getting it back, was reasonably simple.
sudo apt install vinoSource. This is actually a VNC style connection, which meant macOS should now be able to use its Screen Sharing option to remote the Ubuntu machine. But when trying to connect, we would get the error “Connection failed to “XXX’s remote desktop on Xxxxx. The software on the remote computer appears to be incompatible with this version of Screen Sharing.” It turns out that this is a really old problem between macOS Screen Sharing and VNC, where Ubuntu enforces encrypted comms, and macOS doesn’t support this.
To fix this, the tip I found suggested to install dconf-tools, but, this no longer exists in Ubuntu 20.04. However, you can still get Dconf Editor (via Ubuntu Software) and this gives you access to what you need:
- Expand ‘org'
- Expand ‘gnome'
- Expand ‘Desktop'
- Select ‘Remote Access'
- Unslide ‘Require Encryption'
- Exit Dconf Editor
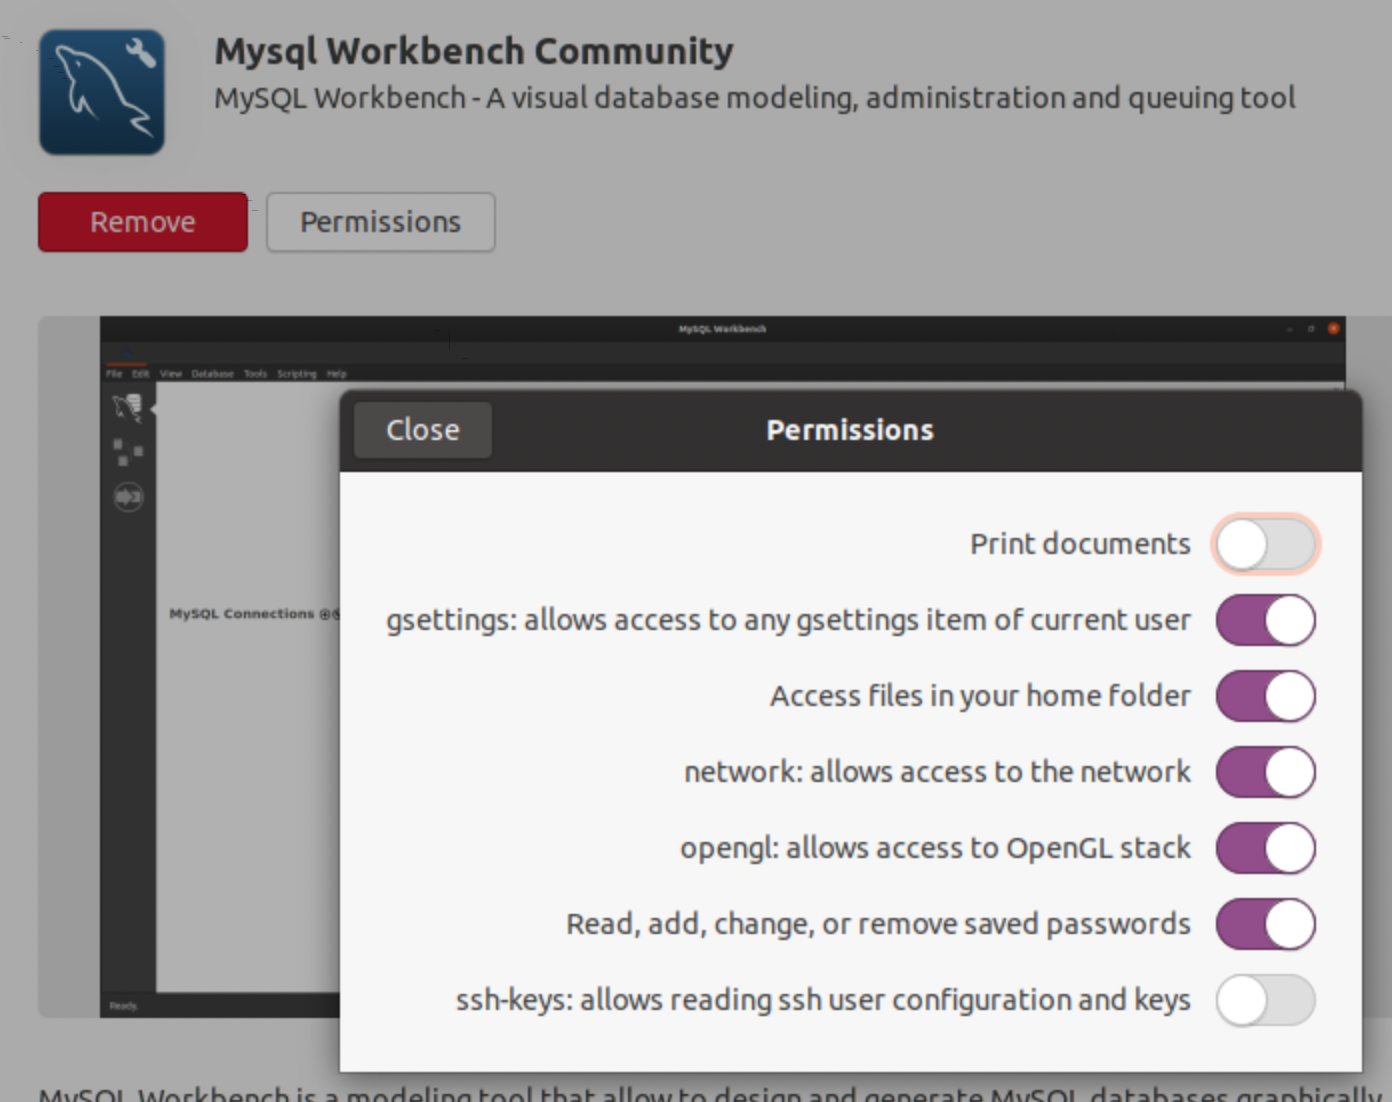
You should now be able to screen share. Source. That was the bulk of the fun with this install, but there were a couple of other things, which were pretty niche. The first was with MySQL Workbench - a graphical frontend for managing MySQL databases. The issue was that trying to create a connection failed with message “Could not store password: An AppArmor policy prevents this sender from sending this message to this recipent.” The fix here was to find MySQL Workbench in the Ubuntu Software then click on permissions, and ensure the ‘Read, add, change, or remove saved passwords’ is enabled:
And finally, a very strange one, where the ability to open the Ubuntu Settings screen (aka gnome-control-center) would just do nothing. My suspicion here is that, for some reason, it gets (or got) removed when I did an apt-get autoclean / autoremove. Why it would do this, I don’t know, but trying to launch it from the cmdline said it was no longer installed. Fortunately thought it can be reinstated fairly easily
sudo apt install gnome-control-centerI think that was the bulk of the fun, but now we do have a fully functional Ubuntu 20.04 virtual machine running in Hyper-V on a Windows Server 2019 host and accessible over the network via hostname using macOS Screen Sharing.
(Why do we make things so complicated?)
Enjoy.